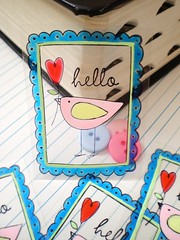
Its "freebie" time again!!!!! I love love love "free" and I know you all do too! I found this adorable Rainbow Stationary set on Paper Glitter's blog found here. It includes a few things such as the printable notes, envelopes, envelope liners, and circle tags which can double as cupcake toppers! I even found a matching party kit on their site. If you are looking to further coordinate and make your package or notes stand out from the rest you can add my chipboard epoxy button embellishments in the Rainbow Bright collection found here to them. Of course if they are "sold" in my shop feel free to contact me and I'll custom make you a set for you. Paper Glitter's blog is filled with wonderful bright things to look at and she has a shop as well. They specialize in printable items such as stationary, party decor, and paper dolls and I have to say
they sure are stunning!
Thursday, December 9, 2010
Tuesday, November 16, 2010
Whimsical Fun DIY Decorated Water Bottles
For awhile I've been thinking of throwing my daughter a party. I have to say the most fun part is thinking of a theme and decorating around it. There are websites that provide endless inspiration. However the biggest thrill is when you could put something together that is SUPER CHEAP! Yes that's right, I said cheap!!! So with that being my inspiration my latest craft I give you are these cute little diy decorated water bottles. All you need is a case of the small water bottles and a roll of large size kawaii deco tape. You can find kawaii deco tape on Etsy by doing a simple search under the supplies category.
Instructions:
1) Measure the circumference around your bottle.
2) Cut tape according to length.
3) Peel off backing and adhere to bottle(s).
It's that simple!
Instructions:
1) Measure the circumference around your bottle.
2) Cut tape according to length.
3) Peel off backing and adhere to bottle(s).
It's that simple!
Monday, November 1, 2010
Customizable Diy Clock
Tick tock, tick tock....do you hear that? Thats the sound of time telling you that your boring walls need a little sprucing up! However you won't need much time to make this easy diy clock that can be customized to match your room in millions of ways thanks to the clever scrapbook industry. For as much paper there is on the market, you have that many choices on how you want your clock to look.
What you'll need;
Instructions;
What you'll need;
Instructions;
- Decide on your clock's shape. Adhere paper to foam-core board using spray adhesive. Cut out the desired shape using a crafts knife.
- If desired, paint chipboard numbers in a coordinating color; let dry. Attach to the clock face with glue.
- Mark the location for the clockworks. Using a 5/16-inch-diameter dowel sharpened to a point (or a round pencil or awl), puncture a 5/16-inch hole. Carefully trim excess paper from the hole with a crafts knife.
- Follow the manufacturer's instructions to attach the clockworks
Saturday, October 23, 2010
Diy Butterfly Cookies
I love parties, I love food (especially the kind thats not healthy for you!), and I love decorations! In fact the sites that I frequent the most are diy party decorating ones. So I was so happy to stumble upon this little one in one of my extremely early morning (ok I admit its late night but who's keeping tabs, right?) surfing sessions. This adorable butterfly cookie tutorial was made and shared by the good folks over at Bird Craft blog. Not only do they share the "how to's" but also link you to where you can find the supplies to make these sugary sweet treats! This would be perfect for any garden themed party whether its a ladies brunch, or a little girl's tea party. Think you have what it takes to bring out the Betty Crocker in you? Than click here and bake away!
Labels:
baking cake,
brunch,
butterfly cookies,
garden tea party
Friday, October 8, 2010
Diy Instant Nursery Wall Art
So its been some time since I last posted. I wouldn't blame laziness this time, rather I have a good excuse for you all! You see I have been rather busy with my precious little baby girl that was born on Sept. 19th 2010! Those of you who have followed my blog for some time now, I know what you are all thinking...."didn't she just have another kid like yesterday?!" Yes I did, a little boy who is now 15 months old! So as you all know, my time is spent changing diapers, reading books, wiping up spit up, dealing with temper tantrums and all the fun things that come along with handling two children under the age of two......big sigh! However I could not be happier, life seems "complete" for me! In honor of all things baby, my latest diy craft is just that! One of the most fun things about expecting and having a baby is channeling your inner artist and decorating the nursery. This can be frustrating for those who are no Picasso! But fear not my fellow mommies and mommies to be! Now you can make a cute diy framed wall art by just simply purchasing a few inexpensive items. All you need is a frame with a pre-cut matte, wrapping paper with a baby theme, and double sided tape or glue.
1)Just simple cut your wrapping paper to the size of the opening of the frame.
2)Adhere the precut matte with double sided tape or glue to the paper.
3) Insert the matted paper into the frame....voila...you have yourself instant wall art!!!!!
It could not be any simpler! As usual...enjoy!
1)Just simple cut your wrapping paper to the size of the opening of the frame.
2)Adhere the precut matte with double sided tape or glue to the paper.
3) Insert the matted paper into the frame....voila...you have yourself instant wall art!!!!!
It could not be any simpler! As usual...enjoy!
Wednesday, September 15, 2010
DIY Felt Letter Pillows
Its been sometime since I have posted. I find myself scouring the internet, bookmarking so many diy crafts with the intention of someday sharing and blogging about it. But when it comes time to actually do it I have a hard time picking or even remembering what I want to showcase! This weeks selection was not a hard one though! Good old Martha shows us how to make these lovely felt alphabet/name pillows using just a couple of items. Not only are these pretty to look at but functional as well. These pillows will get your little one used to how to spell his name. For easy to follow instructions, click here!
Monday, August 30, 2010
Blog GIVEAWAY!!!!!!! Courtesy of Scarlett's Whimsy!
**This contest is now closed. I have used Random.org's number generator which produced number 17 but unfortunately can't get the screen shot right to display here on my blog. Anyhow congratulations Jenny, please contact us to claim your prize within 72 hours**
**Unfortunately the prize has not been claimed and a second runner up winner has been picked. Congratulations #14...Fashuneesta! Kindly contact me to claim your prize within 72 hours**
The 50's conjures up a lot thoughts both good and bad. I did not exist to see those days but know quite a bit about it via popular media. Who could forget "Leave it to Beaver" right?! Whether you think those days were good or bad one thing is for sure, the fashion was very chic! The 50's saw the birth of the A-line skirt, women switching from shawls to trendy coats and feathers....definitely feathers!!!! My next featured shop owner, Scarlett's Whimsy found here has brought that decadent era back with her throwback to 50's inspired vintage headpieces and more. She creates romantic pieces like the one pictured here with its rolled rosettes, feather pieces in pink and aqua blue on creme netting accented with a vintage crystal pin all adhered to a pink headband. This piece also comes with a matching crochet hat (not pictured here). Her entire shop is filled with romantic pieces befitting of fashion diva's like Carrie Bradshaw, such as t these bright pink shoe clips named in honor of her! Definitely my favorite! I have told you my favorite, now I'd like to hear from you! In return one lucky commenter will win this lovely headpiece courtesy of Scarlett's Whimsy on Etsy. What do you have to do to enter?
1) Take a look around her Etsy shop found here and than come back and leave a comment telling me what your favorite item is from her shop. Her bright and vivid pictures make window shopping by itself fun!!!! God only knows how many times I have clicked on her site just to peak!!!!
*note*...in order to insure everyone actually goes into the shop, please kindly list a favorite item OTHER than the one showcased here.
Here on The LemonDrop Tree we make it easy for you to gain additional entries! Read on....
2) For more entries facebook and/or twitter this post and come back and leave me the link (posting on your facebook will be considered one entry and twittering will be considered an additonal entry...so you could do both!).
3) Join her Facebook fanpage found here and come back here and let me know with your username.
Thats a grand total of FOUR ENTRIES!!!! Ok so now I sound like an infomercial so thats my sign to wind things up!
One random winner will be picked this Sunday Sept. 5th 2010 and announced here on the following Monday. You must contact me within 72 hours to claim your prize.
As usual, good luck!
Tuesday, August 24, 2010
Diy Tissue Paper Wall Art
So you think you need to be the next Picaso to decorate your apartment or home walls with something stylish? News flash....you need little to no artistic talent to bring life to your walls with this next diy tutorial courtesy of "In my own Style" blog/site found here. All you need are a few simple items like an artist canvas, modge podge, furniture nail tacks, decorative tissue paper, and ribbon.
This project is so easy that you can even make a few smaller ones and give them away as hostess gifts!
Thursday, August 19, 2010
Schools Back!....Freebie Time!
So as a kid the time I hated MOST was August. Why? Because it was that time of year that all the "back to school" commercials were shown on tv reminding us that our freedom was about to come to an end! It didn't matter how cute the item was that they were selling....cute could not cure that sinking feeling I had in my stomach.
As an adult now, my feelings could not be more different! I LOVE this month! Why? Because it is that time of the year that reminds ME of how I might be getting back some of MY FREEDOM by sending my child off to school....lol!!!!! Don't get me wrong, I love her a lot but every parent enjoys those few silent moments in the day that only school can provide you! In celebration of going back to school I found this most adorable desktop wallpaper background calender available in different sizes for download here, thanks to BerrySprite. Make sure you visit her Flickr stream.....she's got some of the cutest things! So to all my fellow mommies out there....CONGRATULATIONS on surviving yet another summer!
Friday, August 6, 2010
Summer Home Handmade Polymer Clay Button Embellishments-Set of 7
Summer time reminds me of a lot of things.....fresh cut grass, the smell of flowers, vacations and more! I love summer and wish it was all year round! To celebrate the season I made these sweet little polymer clay buttons called "Summer Home" found in my shop here. I baked and glazed these buttons to give them a very shiny surface. Unfortunately my picture taking skills lack a bit and I was not able to photograph the shine! I love how these turned out....especially the hot pink and pearly pale pink colors in this set! I'm playing around with polymer clay these days and expanding my button line to go above the chipboard epoxy buttons I carry in my shop. I've already made several other type of sets/themes just waiting to be photographed. Hopefully I can do that before the summer ends!!!!
Monday, August 2, 2010
Blog GIVE AWAY!!!!!
**This giveaway is now closed ** Congratulations to Daffodil Petals...you are our blog giveaway winner!!!!! Please contact us within 48 hours to claim your prize!
"Girls are made of sugar and spice and everything nice"....we have all heard this sweet little rhyme praising the merits of little girls. However I'm not sure they can be all sugary let alone nice all the time but one thing is for sure...girls definately do have the nicest things! Whether it is a beautiful bright wardrobe, glittery shoes or sweet hair accesories, nice is not a strong enough word! Girls are like little dolls for grown up people like me to dress up and accesorize! So if most of you are like me and share my sentiments you will appreciate this next blog giveaway courtesy of Brinababe's Shop over on Etsy! One lucky winner will win a yellow or orange satin rose band (your choice) like the one pictured here! Each hair band comes with three beautiful satin roses on it and is sure to compliment any summer outfit! So what do you have to do to enter the contest? Easy peasy!
1) Take a look around her Etsy shop found here and than come back and leave a comment telling me what your favorite item is from her shop. Personally I'm really digging her "damask wipe clutch"...so classy!
Want additional entries?.....no problem!
2) Take a look around this other shop of her's found here and leave an additional comment here on my blog. Her "pettiskirts" are just the cutest things!
But wait....there's more!!!!
3) For more entries facebook and/or twitter this post and come back and leave me the link (posting on your facebook will be considered one entry and twittering will be considered an additonal entry...so you could do both!).
One random winner will be picked this Sunday August 8th 2010 and announced here on the following Monday.
Good luck to all and may you have fun dressing up your little dolls!!!!
Labels:
blog candy,
blog contest,
blog give away,
head band,
satin rose band,
satin roses
Thursday, July 29, 2010
Popsicles, Popsicles, and More Popsicles!
Etsy, crafts, and bright colors are a serious addiction for me! As if the countless hours on that site looking up truly unique things is not enough for me I found a new hobby....creating "treasuries". A treasury is a showcase of items from other people's shops that you admire. You can put it together by theme, colors, etc. My first showcase was inspired by my previous blog entry explaining how to make diy soaps. The popsicle soaps inspired me to look up all things "popsicle" related and voila...this is what I came up with. The colors are so bright, so vibrant that I just HAD to share! To get a closer look at each item featured in my treasury and where to purchase them click here.
Friday, July 23, 2010
DIY Soap Tutorials
The art of soap making goes back hundreds of years. Over time it has evolved from simple white square bars to something that can function as both a practical cleaning product and a decorative item. There are several great online tutorials to making soap but a really comprehensive sight that lists the different types of soap making process can be found here. Not only will you find the different methods but also everything from lotion formulas, coloring options, to building soap cutters and more. However if you feel like you can't master this fine art or don't have time then I suggest checking out this online shop for their cute popsicle soaps. You will find a wide range of glycerin soaps in Soapy Love's shop from these citrus soaps pictured here to "Peachy Keen", "Confetti Cupcake", "Candy Carousel" and more. I'm in love with the pink grapefruit ones! Be the hit of your next party with these as your centerpieces!
Saturday, July 17, 2010
Printable Eye Chart Expression!
Reading those traditional eye charts at the eye doctor's office can get a little bit difficult sometimes. However your eyes won't have a hard time looking at these easy on the eyes eye chart expressions! The online store www.ink-bloom.com produces a PDF set of 18 different sayings in the form of these eye charts ranging from "I Love You Mom..." to "Your the Best Teacher..." etc. All you have to do after purchasing and downloading is print them on pretty bright blank cards like these.
Sunday, July 11, 2010
Easy DIY Colorul Room Project
Colorful, fun, flirty, girly, feminine, vibrant, whimsical....all words that come to my mind when I see rooms like this! To achieve this look or something close to it is relatively easy. Buy several colorful pillows to decorate your room. If you are good at sewing, even better....make your own and save some of the fabric. Purchase a few plastic frames from a thrift store, dollar store, Walmart etc. (anywhere) along with Krylon Plastic Fusion paint. Lay your frames out on plastic sheeting or any other protective cloth. First prime your surface if needed and than spray away with 30 second intervals. Allow the paint to dry (approx. 30 minutes) and voila....you have yourself a colorful frame! Repeat a few additional times with your other frames using other colors to coordinate with the fabric within your pillows. Also purchase other plastic nic nacs of your choice like the owls in this picture and spray away in the same manner you did with the frames. Now remember that additional fabric I mentioned earlier to you diy sewers? Use that in the frame. For those of you who bought your pillows and don't have the extra matching fabric, no problems! Just use any other fabric that goes well....the print does not have to match the print of the fabric in the pillows for this project. You could even use scrapbook paper instead in the frames.
Wednesday, July 7, 2010
So "Tweet" Cookies!
Awww, these look so sweet! But what are they? They are cookies of course! But why do they look so smooth you may ask? That is because over at the blog "The Decorated Cookie" they were playing around with what the baking industry calls "poured icing sugar", a sugar you usually pour opposed to roll out like fondant or pipe. It is usually reserved for little baked goods like petite fours to give it that smooth finish. The Decorated Cookie blog has been gracious enough to share with us the "how to" to be found here if you'd like to take a stab at making these cute cookies. All I can say is, they are just so "tweet"!!!!!
Thursday, June 24, 2010
Free Printable Polka Dot Gift Tags
I love you my followers and those who pop in to my blog! Thats why I want to give you guys something. I found these diy free printable polka dot gift tags on the blog Hello, Good Gravy's site found here. Who doesn't love free huh? There are more free printables on that site ranging from candy colored gift tags similar to these to seed packet wrap around labelss, and to do lists. I love these in particular because of their vibrant colors and the fact you are not limited to a tag for a specific holiday ie. Christmas gift tags etc. Attach these to any gift or use them as journaling spots in your scrapbook layouts. The possibilites are limitless. Enjoy and thank you for visiting my blog!
Tuesday, June 22, 2010
DIY Flower Wrapped Favors
The LemonDrop Tree blog is all about bright, all about colorful, all about pretty and all about creativity. So when I saw this on the Martha Stewart site I knew I just had to share share share! These simple favors/party decorations/center pieces are easy to make and require just a few things. You will need acetate cylinders, tissue paper, and ribbon. Don't forget the candy by the way to fill the insides of the tube! To make just follow these simple easy instructions found here. These would look great with many of them grouped off together in may colors. I can imagine them on a tiered cake stand as a center piece. These would also look nice with tissue paper pom pom decorations that I blogged about awhile ago here. Pair them together for a festive look.
Saturday, June 19, 2010
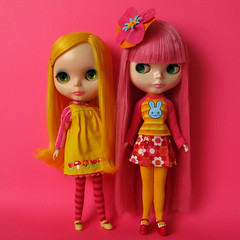
Blythe Dolls....My NEW Love!
You guys all know how much I love whimsical things. I recently stumbled upon a collector's doll that adults seem to be going crazy over. It is called Blythe and apparently it has been around for AGES! I must admit I fell in love immediately with them....with their big heads and eyes on these little tiny bodies, amazing wardrobe, bright hair and so forth. Apparently the craze extends to customizing them with different color eye chips you can change to give a different look, like for example bright pink or purple eyes! People buy customized hair style wigs in every color under the sun for these things too! This doll has the BEST wardrobe I've ever seen on any doll! Imagine a pink fur coat and punk rock boots?! Just check Ebay to see the selection. So as you can tell with this much research into a doll, I HAD to find out the price so I could purchase one to play with, right? Well I did and they seem to start and go for $150!!!! Sniff sniff! I guess I can stop holding my breath waiting for one now!
Thursday, June 17, 2010
Watermelon Popsicles and Ice Cubes
Now that summer vacation is just around the corner, the kiddies will most likely spend most of their time outside riding bikes, swimming, running around etc. One thing is for sure with the summer heat beating down their backs....they will be hungry and thirsty for something cold and refreshing. Nothing says refreshing like popsicles! However all that sugar with little to no health benefits has some people shying away from giving too much to their kids. So why not try to make your own watermelon fruit popsicles at home? They are simple to make, look great, and taste even better! Here is what you need to get you started;
- Ingredients:
- Watermelon
Chunks of fresh fruit - try grapes, strawberries, or kiwi fruit - Instructions:
- Puree watermelon and pour into Popsicle molds. Drop in chunks of fresh fruit, insert caps and place in freezer. Serve when frozen.
Wednesday, June 16, 2010
New This Month to the Shop.......
New to my shop this month are these VERY BIG Chipboard Epoxy Button!. This particular set comes in lovely feminine shades of light blue, pale yellow, light orange, and bright pink....not to mention the glitter buttons! You can't forget the glitter! There are nine buttons to this set in several different sizes just ready to embellish all your crafting needs. If you are a paper crafter such as a scrapbooker, these make beautiful embellishments for your layouts. However they are not limited to just paper crafts. I love how these turned out with the eclectic mix of doodled images in flowers, heart and crossbones, paislies, stitches, and the big fat diamond ring! However this diamond ring won't break your budget. The whole set comes for under $7.00! Now where can you find a diamond for that price?!
Wednesday, June 9, 2010
Rainbow Cake Necklace
Ummmm....Rainbow Cake! But its so fattening! Ahhh fear not. Not this little piece of heaven! I LOVE cake but can't stand the idea of all the extra calories, but now I can have cake without having to worry about getting heavier by the forkful! Etsy seller Sea of Creations has found a way for us to have our cake and watch our figures at the same time! In case you could not tell, this isn't really cake, its a charm necklace. And if you could not tell than its time to get your eyes tested! I love how kawaii or shall I say cute this is! The colors are absolutely beautiful! Makes me actually really want to have cake! In case you want some too you might want to check out this previous post of mine here on how to make a cake that looks just like this one!....and you can actually eat mine! But in case you perfer to do without the real thing but would still like a slice of cake you can find this cute necklace here.
Friday, June 4, 2010
Tranparent Overlay Embellishments
I've been adding more things to my Etsy shop lately. One of the things I noticed that were hot in the scrapbook industry is transparent overlays. However they usually come in large 12x12 size sheets and for some reason I always feel bad cutting up a whole sheet when I just need a small portion. I always feel like I should be using the "whole" thing for a layout, not just bits and pieces. I ended up designing these "little" transparent overlay embellishments for your scrapbook layout or a greeting card. Now I don't feel guilty using them! I just love the color of these. Aside from the pink and yellow, the blue, green, and red are a transparent color! These are sure to cheer you up and add fun to your next paper project!
Thursday, May 27, 2010
DIY Tissue Paper Pom Poms
So many brides or party hostesses look for inexpensive ways to brighten up the decor for that special day. Paper lanterns now have some competition with these beautiful yet delicate tissue paper pom poms. Martha Stewart makes a diy kit that you can find at your local Michaels craft store if you have one near by but why bother when you just need a few simple items to make these adorable floating eye candies. All you really need to purchase if you already don't have on hand is tissue paper (duh!), floral wire, monofilament, and some scissors. Follow the step by step instructions found here and get ready to ooh and aah everyone at your next soiree!
Thursday, May 6, 2010
Almost Sugar Free Rock Candy Recipe
Old fashioned candy never looked so good! Rock candy or swizzle sticks as some call it have been around since the crack of dawn. Not only is rock candy yummy tp eat and fun to look at with all its beautiful rainbows of color but it can also double as an interesting science project in the art of crystalization. But honestly are we really interested in that right now? No I didn't think so! With its wide pallette of colors you can customize this candy to go with any party decor. Of course you can buy it in bulk but why not have some fun and make it at home intead? There are MANY rock candy recipes online but the one that caught my attention was the "sugar free" recipe...well almost sugar free! Now there is no reason to deprive that diabetic at your party or the one who's watching their weight. You can find the recipe here. To add flavor check out Lorann's Oils for candy. You can find them here. Ummm imagine mango or watermelon flavor rock candies? Oh the fun you can have!
Saturday, April 17, 2010
Handmade Sour Cream Container Favors
I know, I know, its been way toooo long since I last posted. I have been up to my ears in crafts and trying to make enough stuff to fill my etsy shop. I have been making chipboard epoxy buttons, clay buttons, clay embellishments, and more things to fill my shop. The worst part being is that I keep buying supplies that I think are cute in hopes of using it but don't get around to doing so. What does this mean? I spend more money than whats coming in!...lol! Anyhow I found this adorable craft online that I wanted to share with you my faithful readers! They are handmade sour cream containers which you can fill with goodies and hand out as favors at your next party! I love this craft because you can use all those pretty scrapbook papers and embellish at whim! I love what she has done here...the little flowers with crystal accents...too cute. If you want to make one of your own, the instructions are oh so easy! Just click here and enjoy!
Monday, March 8, 2010
Water It or Vase It!...DIY Vase.
Some things are so simple and nice looking that when you see it you slap yourself in the forehead and say "now why didn't I think of that!?" This is definately one of those moments. These creative yet simple vases are constructed of two materials you can find at any hardware store, pvc pipes and a clamp. The first picture displaying the blue see through pvc pipes I believe are those simple rubber water pipes you might find under your sinks. Now I'm not suggesting you take those out!...its better you go to the hardware store for that. This craft looks simple enough....do I have to explain?!!! Well I guess I should anyways! Just take the rubber pipes and cut to different lengths. Cut the ends on a diagonal for a cooler look. Bunch them up together bringing either ends of all the pipes together. Clamp in the middle and voila...you've got yourself a cool vase!
Labels:
crafting with pvc,
diy decor,
diy vase,
modern diy decor,
modern vase,
pvc crafts
Tuesday, February 16, 2010
DIY Butterfly Embellishment Drinking Straws
I know, its been quite some time since I posted. Seems like I say that a lot sometimes at the beginning of my posts! So its usually guilt that drives me to finding and posting an extra cute craft. So in the spirit of cute I present these dreamy fluttery butterfly straws, a different take on the umbrella in your drink embellishment. I know summer is some time off but these lemonade drinks just make me feel that much more ansy for summer to come. The people at Good Housekeeping bring you this latest craft with a downloadable template here. All you have to do is download, trace, cut, and decorate. YES its really THAT easy! Just trace one butterfly onto regular scrapbook material and the other onto vellum to create a layered look. Coordinate these with your next theme party. While your at it, make extras and attach a few on clear fishing line and hang from a tree or the ceiling. Hang butterflys everywhere to create a summer theme that everyone will be sure to love.
Thursday, January 14, 2010
Iron On Pillow Case Transfer Project
Tired of DIY projects piling up because every time you start one you think "this one shouldn't take too long"? Before you know it you have several, and I do mean SEVERAL projects on the back burner and not even one complete...sigh! Well rest your head on this one! No...I mean literally...rest your head on this one! This project should take you no more than one hour...tops! Make this for your special someone and put a smile on his/her face with these sweet little words. All you need is
- Two pillowcases (light colors will work best)
- Iron-on Transfer Paper for light colored fabrics. (tee-shirt transfer paper). Be sure that it is the correct type for your color printer. You will need two sheets.
- Color printer
- Scissors
- Iron (no steam)
Friday, January 8, 2010
My Gift to Myself!!!!
You know how something on first sight can just take your breath away and make you say "Oh I love THAT!"? Then you just keep staring at it for days and tell yourself you NEED that or just can't live without it? Then you try to justify WHY you need that?! Then finally you purchase it telling yourself that its really not that much! Well this was exactly my reaction when I was browsing around on Etsy and accidently came across this acrylic laser cut necklace called "Whatever Lola Wants", and boy was I glad! It really was not a whole lot to spend on something this beautiful and unique. It was rather quite reasonable at $22.00 for a piece of neck art! So I have been anxiously awaiting its arrival and today I opened up my mailbox to see the big old box sitting there screaming at me...."open me, open me!" I rushed my package home, laid it down gently on the table and than just tore it open. There in front of me was my gift to myself for being a good girl! We all need to gift ourselves ever once in awhile don't we? Anyhow I took it out and the first thing I noticed was its craftsmanship. I can't believe someone made this! I would have paid double the price for it! The only problem I do have with it is now I need to go find the right top to wear it with! I think a cute little ruffled top might do the trick....think I need to gift myself AGAIN for not spending too much money the first time around...lol! If you've been a good girl and think you need to reward yourself than make your way over here to Untamed Menagerie's shop on Etsy. I promise you won't be disappointed!
Tuesday, January 5, 2010
Snowman Cookies
Winter time brings so many great memories to mind...playing in the snow with my brother and snowball fights followed by a hot cup of cocoa. These little things stick out in my mind now that I'm an adult. I want to create new special memories...new memories that my daughter will cherish as she grows up. She loves to bake (or help with baking) so I promised myself I would spend one day a week doing this special activity with just her. She also has a creative artsy streak (ummm I wonder where that comes from?!) so I thought making these winter snowman cookies would be perfect! Plus I could not resist the lovely colors of the "disco dust" in the little pots used on the scarves of the snowmen! I just love color! If you want to create your own special memories making these cute winter themed cookies than click here....and as usual, have a crafty day!
Subscribe to:
Posts (Atom)